
How to Format an Indian Government Job Bio Data Professionally in 2026
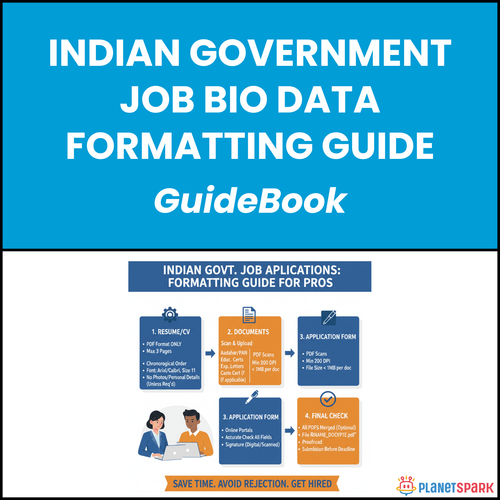

Creating a Perfect Indian Government Job Biodata: A Step-by-Step Formatting Guide for Professionals
Applying for government jobs in India
is not as simple as submitting a resume. While private-sector resumes emphasise achievements and creativity, government biodatas demand precision, structure, and strict adherence to prescribed formats. Many qualified candidates lose out—not due to lack of merit, but because of formatting errors, missing details, or deviation from official standards.
This comprehensive guide explains exactly how to format your Indian government job biodata correctly. Drawing from official recruitment frameworks like UPSC, SSC, State PSCs, and PSUs, it walks you through every rule, structure, and requirement so you can prepare a biodata that’s complete, compliant, and credible.
Who Is This Blog For?
- Working professionals applying for central, state, or PSU jobs
- Career changers transitioning from private to government sectors
- Students or fresh graduates preparing their first government application
- Consultants or contractual professionals seeking permanent posts
- Anyone struggling with biodata rejection due to incorrect formatting.
Why This Topic Matters Today?
Government recruitment has become more competitive and system-driven than ever. Departments now process thousands of applications through digital screening and document verification systems. Minor formatting issues—like name mismatches or missing declarations—can lead to automatic disqualification.
According to government recruitment data, most rejected applications fail during the first screening stage due to preventable formatting or completeness issues. A well-structured biodata not only helps you clear administrative filters but also demonstrates attention to detail—an essential trait for public service roles.
Core Concept or Framework Explained
The difference between a government biodata and a corporate resume lies in purpose. A resume markets you; a biodata records you.
Corporate resumes are:
- Achievement-focused and flexible
- Designed for branding and persuasion
- Usually one to two pages long
- Optimised for ATS and visual presentation
Government biodatas are:
- Information-focused and standardised
- Prescribed by departments for uniform evaluation
- Often longer, covering complete career history
- Manually verified for accuracy and completeness
In essence, the government biodata serves as your official record—it becomes part of your permanent personnel file if selected. Therefore, accuracy, consistency, and completeness outweigh creativity or design.
How This Blog and Guidebook Help You?
This guide helps you master government biodata formatting through:
- Clear breakdowns of mandatory sections
- Real examples drawn from UPSC, SSC, and PSU formats
- Practical formatting rules for fonts, margins, and layout
- Detailed checklists to prevent rejection
- Templates and worksheets for fast, error-free completion
By applying this knowledge, you’ll not only prepare a compliant biodata but also increase your chances of shortlisting and verification success.
Step-by-Step Breakdown
Step 1: Understand the Core Structure
Every government biodata follows a fixed order of sections. Missing even one mandatory segment can cause immediate rejection. The core structure includes:
- Personal Information
- Contact Details
- Educational Qualifications
- Employment History
- Additional Information
- Declarations
This order allows evaluators to locate details quickly across hundreds of applications.
Step 2: Fill Personal and Contact Information Accurately
This section verifies your identity and eligibility.
Include:
- Full name (as per 10th certificate)
- Father’s and mother’s name
- Date of birth and calculated age as of application closing date
- Nationality, religion, caste category, marital status
- Permanent and present addresses with complete PIN codes
Formatting guidelines:
- Always match name and date of birth exactly as per 10th certificate
- Use prescribed caste codes (GEN, OBC-NCL, SC, ST, EWS)
- Ensure mobile number and email are active and professional
Common mistake: Using your passport or degree certificate name instead of the 10th certificate name. This creates mismatches during verification.
Step 3: Format Educational Qualifications Correctly
Present your qualifications from highest to lowest in a clean, tabular layout. Include:
- Examination name
- Institution and university
- Year of passing (result declaration year, not course completion)
- Percentage or CGPA exactly as per marksheet
- Division or grade
If you hold professional or technical certifications (like NIELIT, DOEACC, CA, CS), list them separately with issuing bodies and registration numbers.
Step 4: Document Complete Employment History
Government applications require exhaustive employment details—covering every role since completing your education, including internships or breaks. For each role, provide:
- Organisation name and address
- Designation
- Joining and relieving dates
- Pay scale or CTC
- Nature of duties (50–75 words)
- Reason for leaving
Gaps must be explained clearly (e.g., further studies, exam preparation, or personal reasons). Transparency builds credibility and avoids rejection.
Step 5: Follow Formatting Standards Strictly
Formatting rules are not optional—they exist for administrative uniformity.
Follow these universal guidelines:
- Font: Times New Roman or Arial, size 11–12
- Line spacing: 1.15–1.5
- Page setup: A4 with 1-inch margins
- Layout: Left-aligned, single column, portrait orientation
- Avoid graphics, logos, and coloured text
Only use bold for section titles, italics for minimal emphasis, and tables for structured data.
Step 6: Attach Proper Photograph and Signature
Photograph requirements:
- Recent (within 3 months), passport size (3.5 x 4.5 cm)
- Light background, neutral expression, formal attire
- JPEG/JPG format, 20–50 KB, 200 x 230 pixels
Signature requirements:
- Sign on white paper with black or blue ink
- Scan at 300 DPI, JPEG/JPG format, 10–20 KB
- Use same signature across all documents and applications
Maintain identical photo and signature for every government submission to prevent confusion during verification.
Step 7: Use the Pre-Submission Checklist
Before submission, verify your biodata with this checklist:
- Name and date of birth match official records
- Educational and employment sections are complete
- Gaps explained, percentages verified
- Documents scanned at correct resolution and file size
- Font and order meet government standards
- Declaration signed with date and place
Step 8: Understand Department-Specific Variations
Different recruitment bodies have unique requirements:
- UPSC: Requires Detailed Application Form (DAF) post-prelims, including hobbies, achievements, and job duties
- SSC: Uses dropdown-based online forms needing exact percentages and reservation certificate details
- State PSCs: Often require domicile, local language proficiency, and family income declarations
- PSUs: Allow slightly flexible formats but demand GATE scores, project details, and patent/publication lists
Step 9: Avoid Common Mistakes That Lead to Rejection
According to the guide, the most frequent errors include:
- Name mismatches or spelling variations
- Missing lower qualifications (10th or 12th)
- Incorrect year or percentage formatting
- Overlapping or unexplained job timelines
- Oversized or unclear photo/signature files
- Missing signatures or incomplete declarations
These can cause instant disqualification during the initial screening stage.
Step 10: Handle Special Situations Professionally
Special cases require extra care:
- Career breaks: Mention “Career Break” with dates and brief reason
- Name change after marriage: Use 10th certificate name first; add “Currently known as [married name]” with certificate proof
- Foreign degrees: Include AIU equivalence number or application proof
- Current government service: Mention employee ID, department, and note that NOC will be provided if selected
Step 11: Prepare for Document Verification
After shortlisting, every claim will be verified. Prepare your folder with:
- Originals and two sets of self-attested copies
- Category and experience certificates
- NOC (if employed)
- Identity and address proofs
- Multiple copies of the same photograph and signature
Organise documents in the same order as your biodata—it speeds up verification and projects professionalism.
Common Mistakes or Pitfalls to Avoid
- Using creative layouts or decorative fonts
- Leaving sections incomplete or unordered
- Forgetting declaration date or place
- Uploading files in unsupported formats
- Submitting last-minute without proofreading
Every rejected application wastes months of preparation. Following structure and precision ensures your efforts pay off.
How Should You Use This Guidebook Effectively?
To make the most of this guide:
- Read it once completely to understand format logic
- Fill worksheets and templates as you go
- Set aside 2–3 focused hours for completion
- Revisit before each new application or update
- Keep a master copy updated monthly with new experience or certifications
This method turns the guide from a resource into a reusable professional tool.
Key Takeaways:
- Accuracy and completeness matter more than creativity
- Always follow the prescribed order and structure
- Verify every date, number, and name carefully
- Use the official fonts and simple layouts
- Keep your biodata, documents, and declarations consistent
- Update regularly to stay ready for opportunities.
Your Next Step: Accelerate Your Career with PlanetSpark
Creating an impact-driven resume is not just about landing your next job—it’s about owning your professional story and presenting it with clarity, confidence, and credibility. When your resume clearly communicates value, results, and impact, opportunities follow naturally.
At PlanetSpark, we are committed to empowering working professionals with practical, outcome-focused resources that drive real career growth. From resume building and workplace communication to leadership presence and professional writing, our programs are designed to help you succeed in today’s fast-evolving job market.
Visit https://www.planetspark.in/resources to explore:
- Career and resume-building guides
- Workplace communication and professional writing resources
- Skill-development tools curated for working professionals.
Want a deeper, hands-on experience?
You can also book a free trial session to learn more about PlanetSpark’s Working Professional Courses, designed to accelerate your career through personalised coaching, real-world practice, and expert guidance.
Your career deserves more than generic advice.
It deserves clarity, confidence, and measurable impact.
Start building that advantage today—with PlanetSpark.